How to Make a Schedule for Employees in Excel (3 Types)
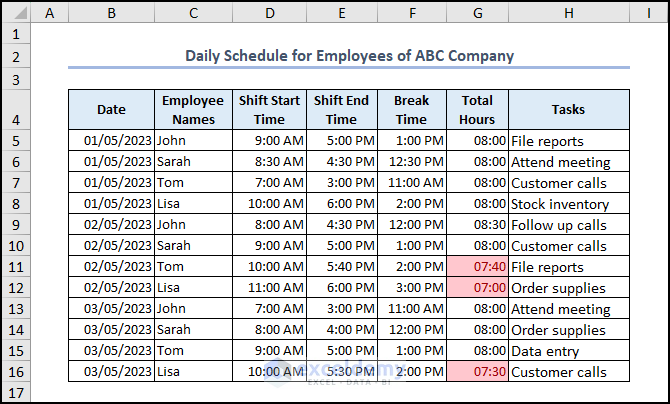
Data that is less than 8 Total Hours will be highlighted.
The sheet now needs Data Validation.
- Select the cells where you want to put the Tasks.
- Click the Data tab and from the Data Tools group, choose Data Validation.
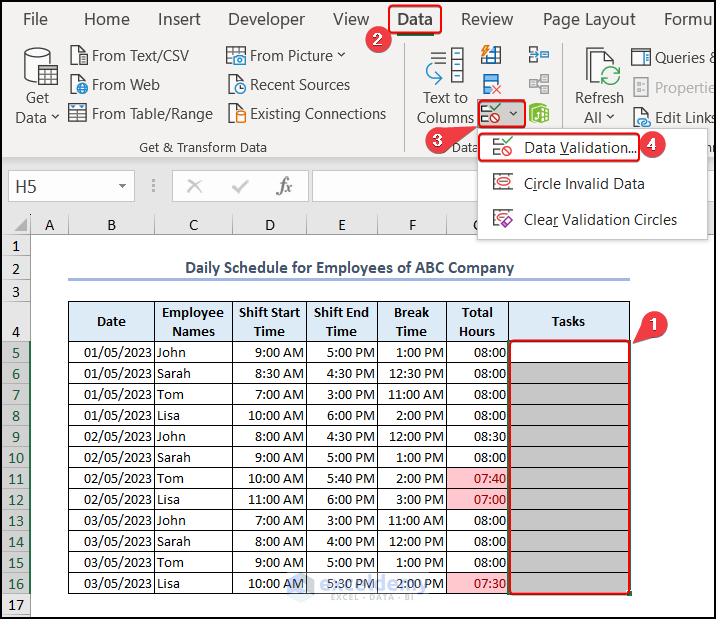
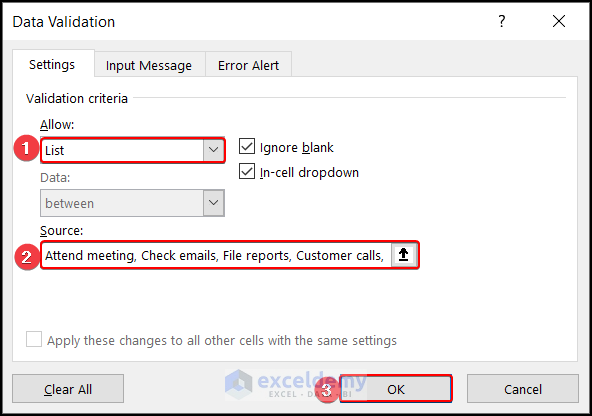
- The Data Validation window appears.
- Choose List from the Allow box and enter the routine tasks for the employees (comma separated) in the Source box.
- Press OK.
- Apply a specific task from the drop-down list for each employee as needed.
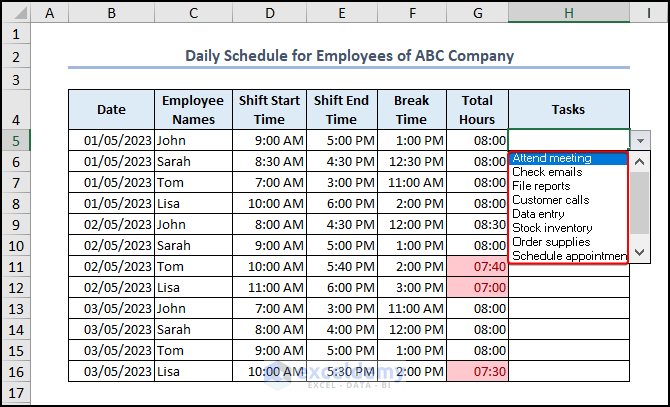
The completed schedule should look like the one below:
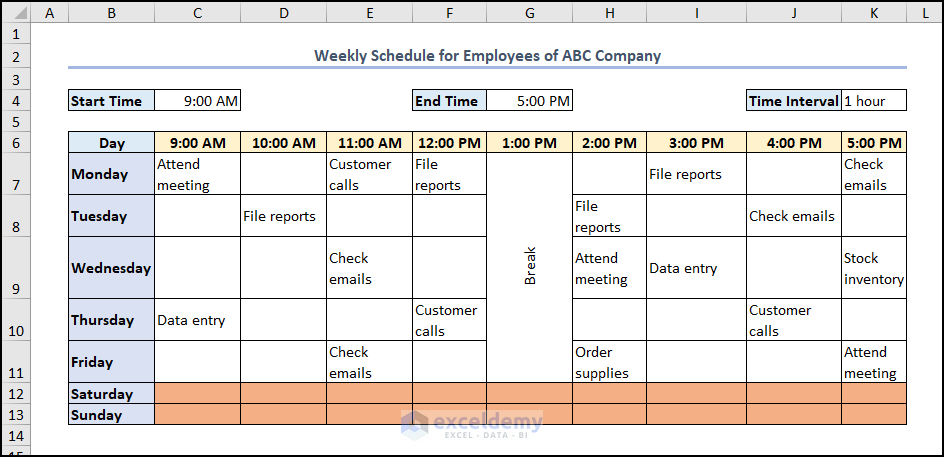
Type 2 – A Weekly Schedule
A weekly schedule concentrates on the tasks that need done every day, instead of the tasks per employee.
- Create a schedule with the days of the week.
- Use Data Validation to add tasks (See the daily schedule above for instructions or click here).
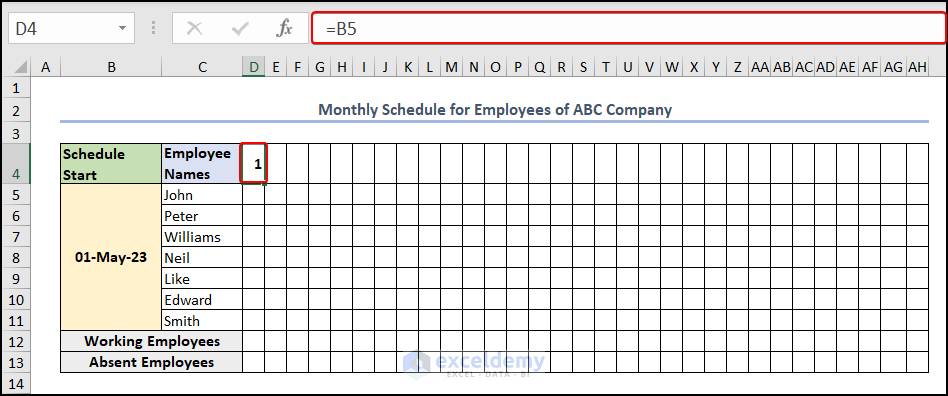
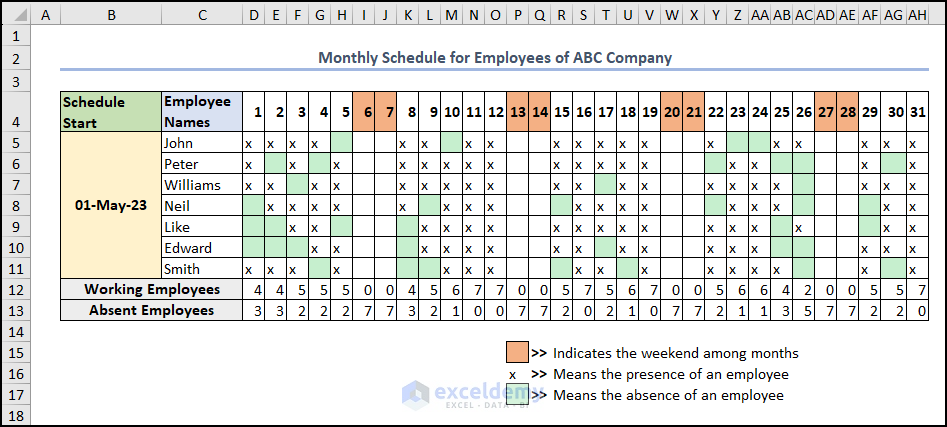
Type 3 – A Monthly Schedule
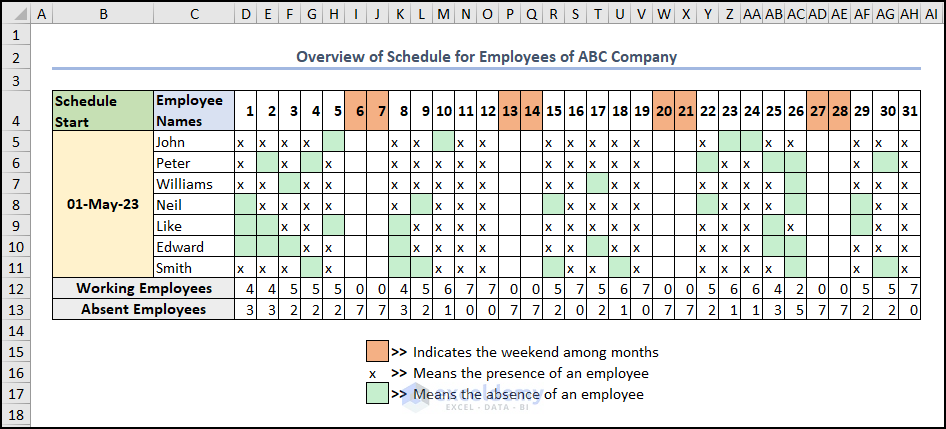
- Insert a Schedule Start date (generally the first day of the month).

- In the first empty cell (D4 in this example) enter the following: =B5 (where B5 is the date cell).
- Format D4 and all the remaining cells in that row to the Date format.
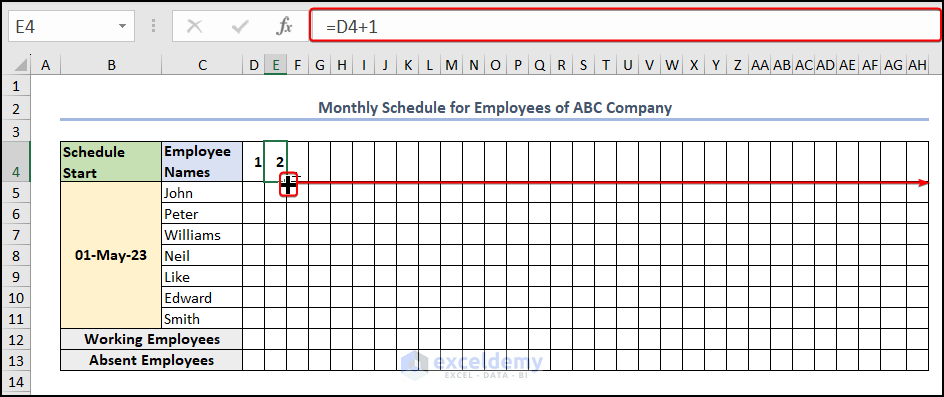
- In the next cell (E4), enter the formula D4+1 to get the next date.
- Use the Autofill Tool to copy the formula to the remaining cells in the row.
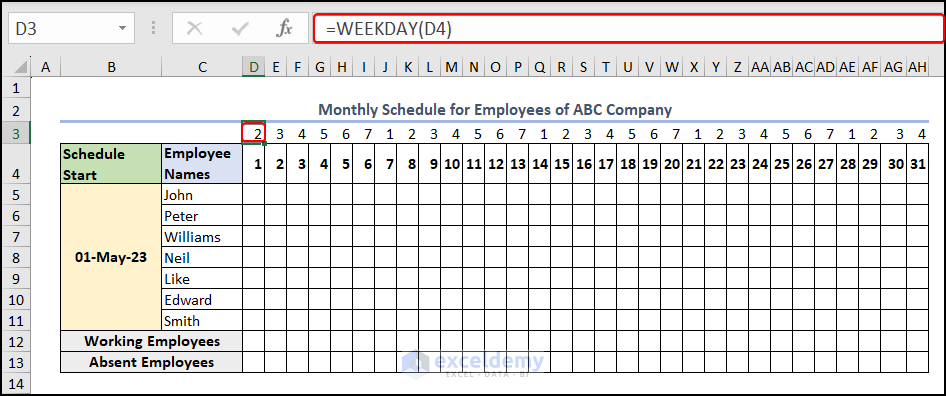
- Use the WEEKDAY function to determine the day of the week for each date.
- Enter the following formula in the cell above the date cell (D3).
=WEEKDAY(D4)
The function shows the insert value of the date in cell D4 to the number of weekdays. Sunday is the first day of the week and Saturday is the last day of the week.
- Press ENTER.
- Use the Autofill Tool to copy the formula to the remaining cells in the row.
- To highlight weekends (or any days the company is closed), select the dates and go to the Home tab.
- Choose Conditional Formatting from the Styles group and pick New Rule.
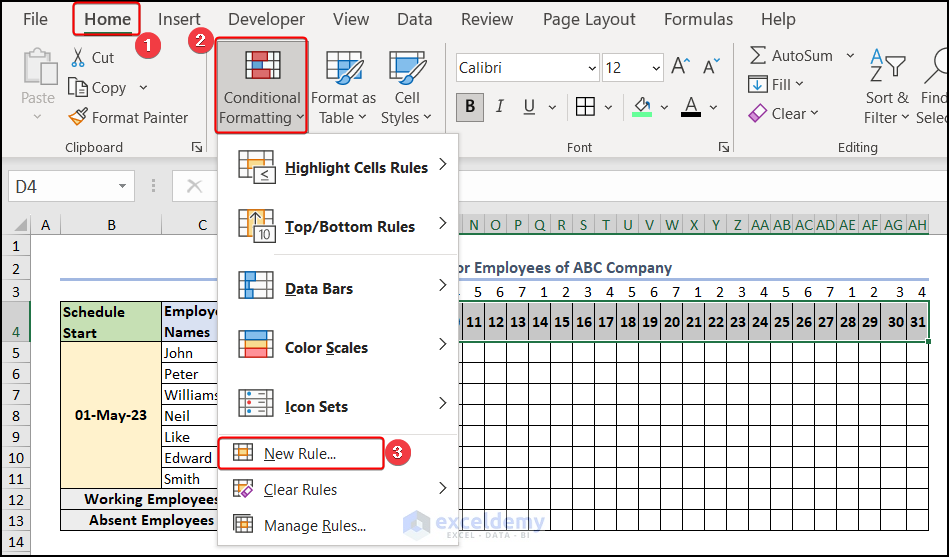
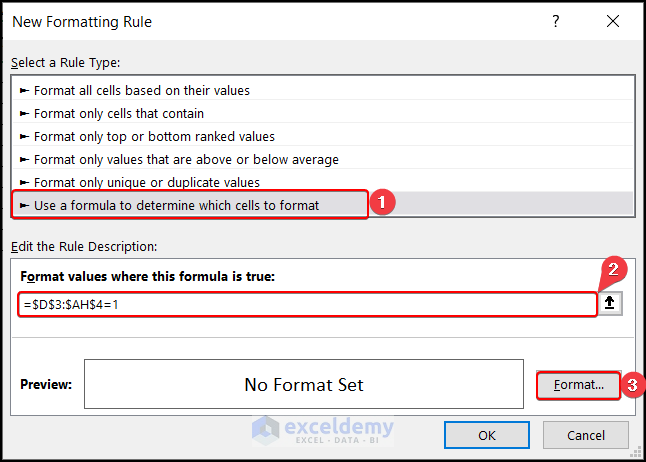
- The New Formatting Rule window appears. Select Use a formula to determine which cells to format.
- Enter the below formula in the Format values where this formula is true box:
=$D$3:$AH$3=1
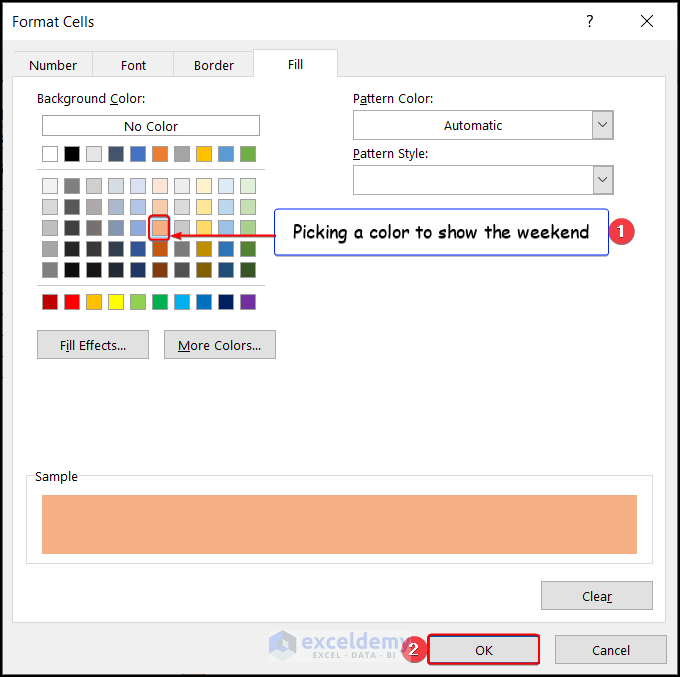
- From the Format Cells window, choose a suitable color from the Fill group, and press OK.
Conditional formatting can also be used to highlight employee absences.
- Select the employee’s attendance sheet and go to the Home tab.
- Choose Conditional Formatting and Highlight Cell Rules.
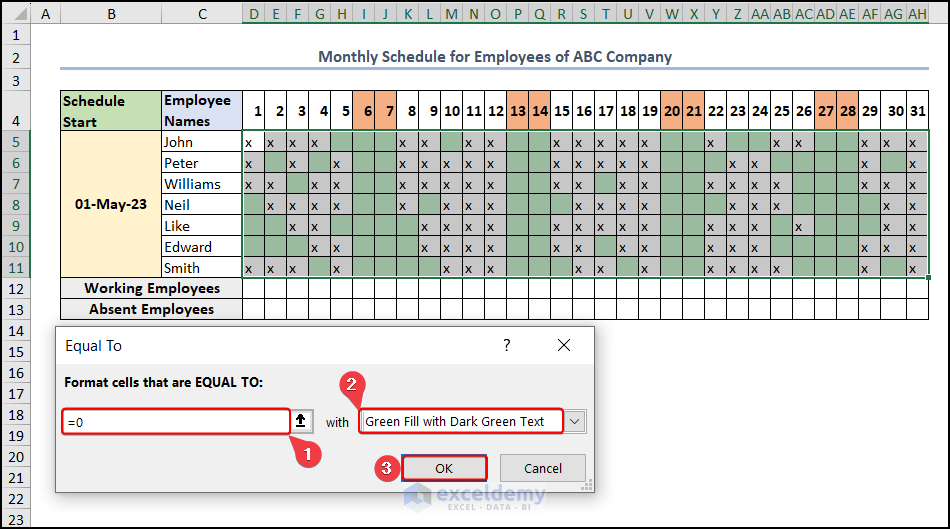
- Pick Equal To.
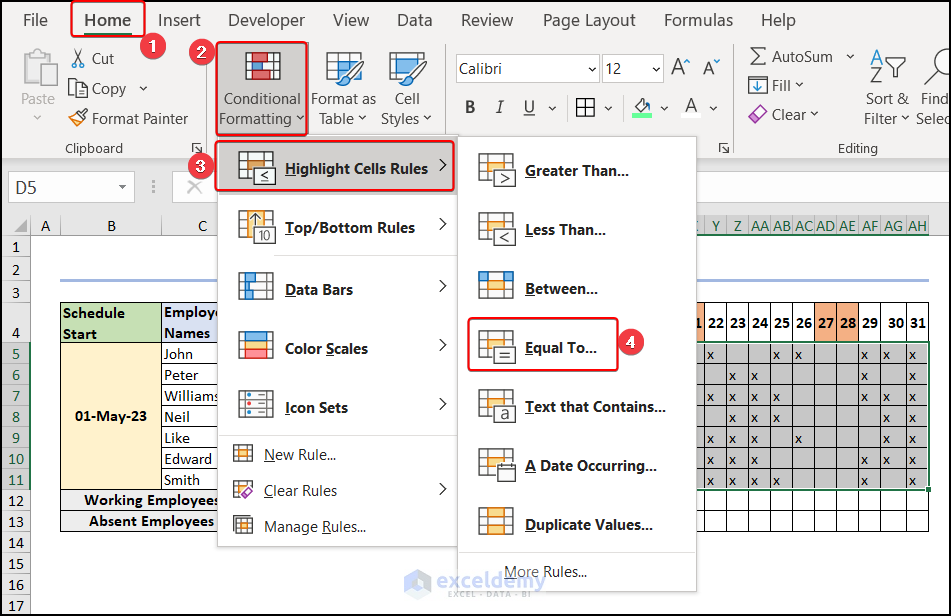
- Type =0 in the Format cells that are EQUAL TO box and choose Green Fill with Dark Green Text in the next box.
- Press OK.
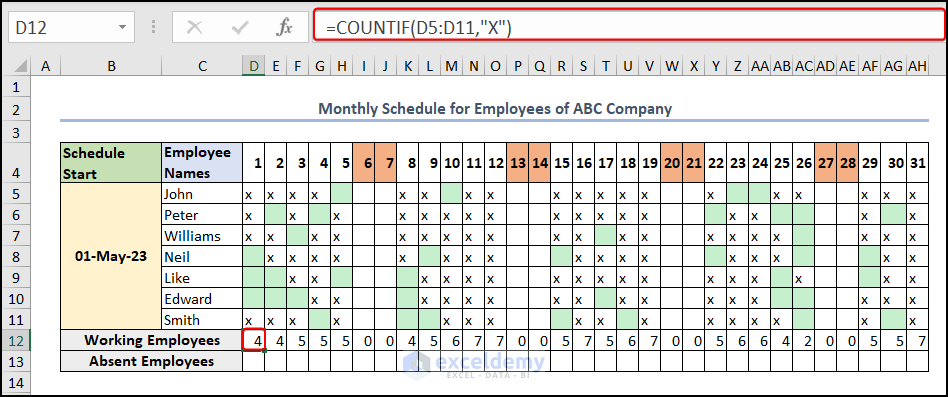
- To count working employees, click the appropriate cell (D12) and enter the following formula:
=COUNTIF(D5:D11,"x")
- Press Enter.
- Use the Autofill Tool to copy the formula to the remaining cells in the row.
- To count absent employees, click the appropriate cell (D13) and enter the following formula:
=7-D12
It will subtract the number of present employees from the total number of employees.
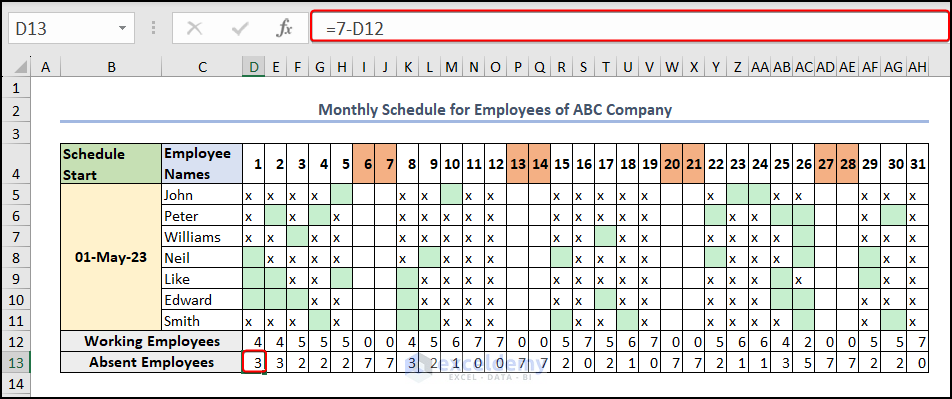
- Press Enter.
- Use the Autofill Tool to copy the formula to the remaining cells in the row.
Things to Remember
- Consider using color coding to make it easy to differentiate between shifts and identify conflicts or gaps in the schedule.
- Keep the schedule simple and easy to read, with clear headings and consistent formatting.
- Make sure to include scheduled breaks or any overtime that may be required.
- Review the schedule regularly and make any necessary adjustments to ensure it meets the needs of both the employees and the business.
Frequently Asked Questions
How far ahead should I make a schedule?
Generally, putting schedules out a week in advance gives employees plenty of time to make arrangements or address any conflicts.
How can I ensure that the schedule meets the needs of both the employees and the business?
Take into account employee preferences and availability, as well as any business requirements or deadlines. It may also be helpful to review the schedule regularly and make adjustments as necessary.
What are some tips for creating an effective employee schedule in Excel?
- Use a built-in template
- Organize information clearly and concisely
- Account for employee preferences and availability
- Factor in breaks and overtime
- Use color coding
- Keep it as simple as possible
- Review and adjust the schedule regularly
Download Practice Workbook
Download the following practice workbook. It will help you understand the topic more clearly.
Related Articles
- How to Make a Class Schedule on Excel
- How to Make a School Time Table in Excel
- How to Make an Availability Schedule in Excel
